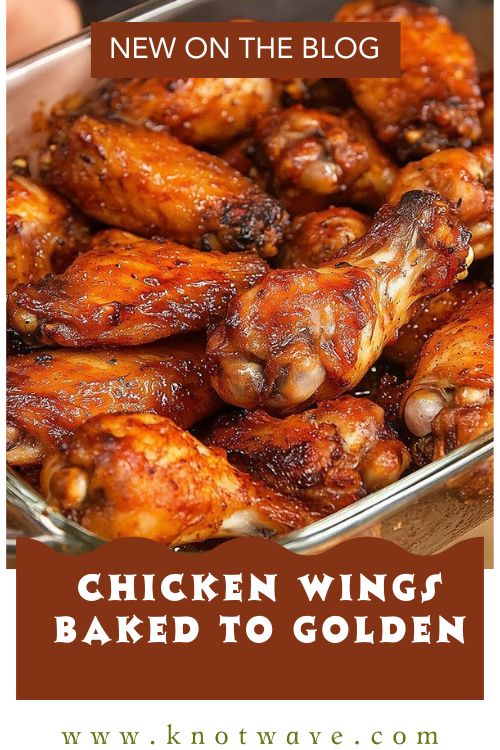
Chicken Wings Baked to Golden Perfection Favorite Recipe
Chicken wings baked to golden perfection favorite recipe is one of those dinners I make when I want the comfort of something familiar without standing over a frying pot. It starts in a quiet, practical way: paper towels on the counter, wings getting patted dry, the oven preheating until you can feel the warmth when you open the door. There’s always a moment when the tray slides in and the kitchen shifts into that steady rhythm of roasting a soft hiss as fat meets heat, the faint crackle from the hot sheet pan, and the first hint of savory aroma drifting out before anyone’s even asked, “How long until they’re ready.
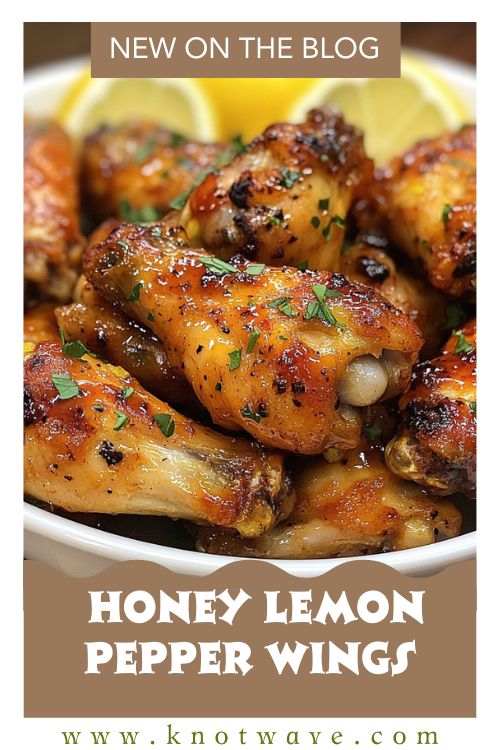
As they bake, the wings change in small, reassuring stages. The skin tightens, then begins to blister in spots. The edges pick up color first, moving from pale to honey-gold, and eventually into that deeper amber that looks like real crispness. When you pull the pan to rotate it, you’ll see juices bubbling where the flats and drums touch the metal, and you’ll notice how the fat has rendered into the pan, proof that the oven is doing the heavy lifting. The smell is clean and mouthwatering: roasted chicken, warm spices, and that unmistakable “something good is happening” scent you only get from a hot oven and a well-seasoned tray.
What I love most is how the texture turns out when you treat the wings gently and let the heat work. You get crisp skin that actually holds up, not soggy or rubbery, with meat that stays juicy inside. They’re the kind of wings you can serve on a busy weeknight with a simple salad, or put in the center of the table on a weekend and let people reach for seconds. No fuss, no drama, just a dependable tray of golden wings that tastes like you meant to make them.

Why You’ll Love This Recipe
-
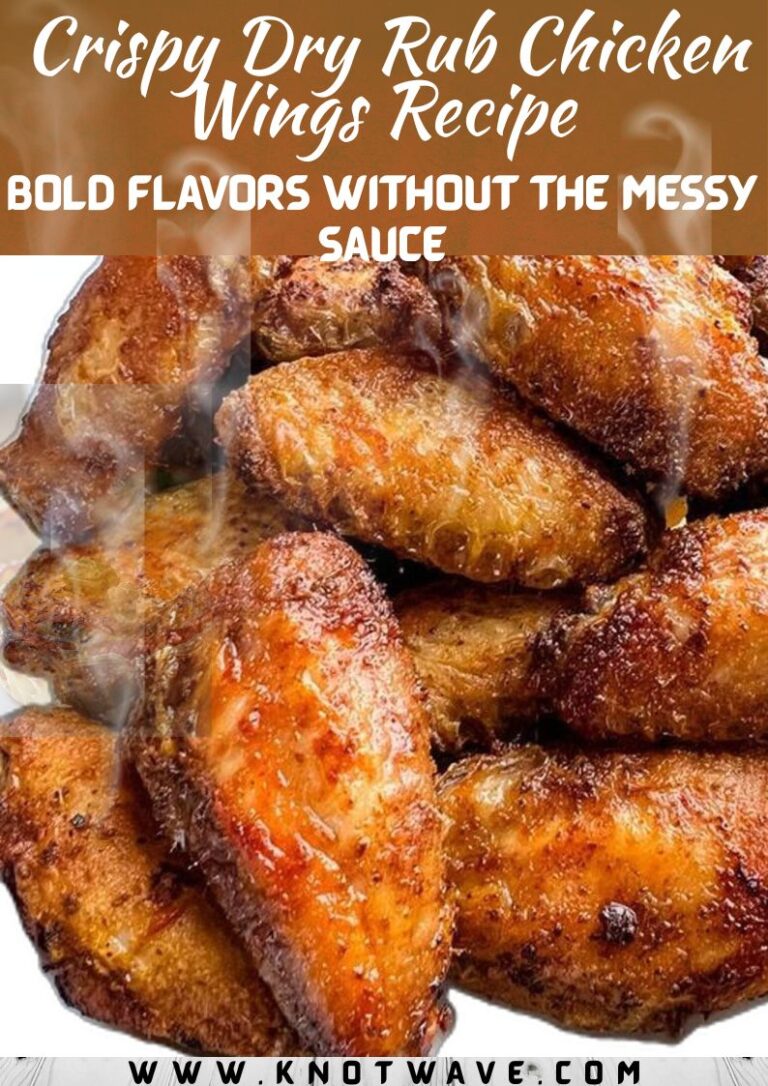
Oven-baked, not fried, less mess, and still plenty crisp.
-
Simple ingredients that don’t require a special grocery run.
-
Crispy skin and juicy meat when you follow the drying step.
-
Easy to scale for a family dinner or a bigger gathering.
-
Works with many flavor directions (classic, spicy, garlicky, lemony).
-
Hands-off baking time gives you space to make sides or relax.
-
Consistent results with a rack or hot sheet pan method.
-
Great for meal prep and leftovers.
-
Kid-friendly and adult-friendly with optional sauces.
-
Easy cleanup if you line the pan well.
Ingredients
-
2 to 2.5 lb chicken wings (drums and flats), separated if needed
-
1 to 1 1/2 teaspoons kosher salt (adjust to taste)
-
1 teaspoon black pepper
-
1 teaspoon garlic powder
-
1 teaspoon paprika (smoked or sweet)
-
1/2 teaspoon onion powder (optional)
-
1/2 teaspoon baking powder (optional but helpful for crispier skin; aluminum-free preferred)
-
1 tablespoon olive oil (optional; use lightly)
-
Optional finishing ideas: buffalo sauce, honey-garlic glaze, lemon pepper, BBQ sauce
-
Optional dipping sides: ranch or blue cheese, celery, carrots
Preparation or Marination
You don’t need a long marinade for baked wings, but you do need one key habit: dry them well. Pat the wings thoroughly with paper towels so the skin starts dry. That dryness helps the surface crisp instead of steaming.
If you have time, you can do a short “dry rest” for even better texture: season the wings and let them sit uncovered in the fridge for 30 minutes to a few hours. It’s not required, but it helps the skin dry further and makes the final crispness more reliable.
If you’re using baking powder, mix it evenly with your spices just a small amount It helps the skin brown and crisp, but too much can leave an odd taste, so keep it measured and well distributed.
INSTRUCTION
-
Heat the oven to 425°F. Line a baking sheet with foil for easy cleanup, then place a wire rack on top if you have one.
-
Pat the wings dry very well with paper towels. Dry skin is what turns golden instead of rubbery.
-
In a bowl, mix salt, pepper, garlic powder, paprika, and any optional seasonings. If using baking powder, whisk it in thoroughly.
-
Toss wings with the seasoning mix until evenly coated. If they look dry and patchy, add a small drizzle of olive oil just enough to help spices cling.
-
Arrange wings on the rack (or directly on the lined sheet) in a single layer with space between pieces. Crowding traps steam.
-
Bake for 20 minutes, then pull the pan out. You should see rendered fat and early golden spots.
-
Flip each wing. The underside should be starting to color and look a bit drier than before.
-
Return to the oven and bake another 20 minutes until the skin looks deeply golden and slightly blistered.
-
For extra crispness, switch to broil for 3 minutes at the end, watching closely. You want deep color, not burnt edges.
-
If saucing, toss wings in sauce while they’re hot so it clings. If you prefer maximum crisp, serve the sauce on the side for dipping.
-
Rest for 5 minutes. This helps juices settle and keeps the skin from softening too quickly.
-
Serve warm with celery and carrots, and any dip you like. The best wings are the ones you eat while they’re still gently crackling.
Recipe Time and Details
-
Prep Time: 10 minutes
-
Cook Time: 40 minutes
-
Total Time: 50 minutes
-
Servings: 4
-
Courses: Main Course
-
Cuisines: American
-
Calories: Approx. 420 per serving (varies by wing size and sauces)
Flavor and Texture Tips
-
Dry the wings thoroughly. This is the difference between crisp and steamed.
-
Use high heat. 425°F helps render fat and brown the skin without drying the meat.
-
Don’t crowd the pan. Space allows hot air to circulate so wings roast, not sweat.
-
Sauce smartly. Tossing in sauce softens crispness; dipping on the side keeps that golden texture.
-
Broil with heat
-
-
attention. A brief broil deepens color. Fasten the watch closely so the edges don’t scorch.
-
Serving Ideas
-
Classic: celery, carrots, ranch or blue cheese, and a simple side salad.
-
Weeknight-friendly oven fries or roasted potatoes, plus a crunchy slaw.
-
A little more “dinner plate”: mac and cheese, roasted green beans, and a squeeze of lemon over the wings.
-
Lighter pairing: cucumber salad, rice, and a tangy yogurt dip.
Storage and Reheating
-
Store: Cool wings fully, then refrigerate in an airtight container for up to 3 days.
-
Reheat: Best in the oven or air fryer at 375°F until hot and crisp, about 8–12 minutes.
-
Avoid sogginess: Reheat on a rack if possible. Microwave reheating works, but it softens the skin.
Recipe Notes
Wings are simple, but a few small choices decide whether they come out truly golden and crisp. Start with a hot oven; 425°F gives you enough heat to render fat quickly without drying the meat. If your oven tends to run cool, let it preheat a little longer than you think you need. That first blast of heat matters.
The second key is surface moisture. Even if the wings look dry, blot them again. Any moisture left on the skin turns into steam, and steam is what keeps wings pale. If you have time, seasoning the wings and letting them rest uncovered in the fridge helps even more. It’s a quiet little step that pays off in texture.
A wire rack is helpful because air can circulate underneath, which helps the bottoms brown instead of sitting in rendered fat. If you don’t have a rack, you can still bake on a lined sheet pan, just flip carefully, and consider draining excess fat halfway through so the wings roast rather than shallow fry in the pan. Either way, spacing is important. Wings packed tightly release moisture, and you’ll end up with softer skin.
If you’re using baking powder, measure lightly and mix it well with your seasonings. The goal is a thin, even dusting, not clumps. Done correctly, it helps with browning and crisping without changing flavor. If you notice an off taste, it’s usually too much baking powder or poor mixing.
Finally, sauce timing matters. Tossing wings in sauce while piping hot gives you great flavor, but it can soften the crispness. If you want the best of both worlds, sauce half and serve the rest plain with dipping bowls. That way, everyone gets what they like, and your tray stays “golden perfection” all the way to the last wing.
FAQs
1) How do I make baked wings crisp without frying?
Dry them well, bake at high heat around 425°F, and give them space on the pan. A rack helps airflow, and a brief broil at the end deepens crispness.
2) Should I use baking powder on wings?
It’s optional, but a small amount can help crisp the skin. Use aluminum-free, measure carefully, and mix evenly with spices so you don’t taste it.
3) Can I bake wings ahead of time for guests?
Yes. Bake until nearly done, then reheat at 375°F for 10-12 minutes right before serving to bring back crisp edges.
4) What’s the best way to sauce wings without making them soggy?
Serve the sauce on the side, or toss right before serving, and eat them warm. The longer they sit in the sauce, the softer the skin becomes.
Conclusion
Something is reassuring about a pan of wings in the oven. You’re not juggling hot oil or wondering if you’ll nail the timing; you’re simply letting heat do what it does best, slowly turning seasoned chicken into something deeply golden and satisfying. Chicken wings baked to golden perfection favorite recipe is a solid, repeatable way to get that crisp skin and juicy bite without overcomplicating dinner.
Once you make them this way a couple of times, you start trusting the signs: the skin tightening and blistering, the edges turning amber, the gentle bubbling in the pan as fat renders. Those cues matter more than exact minutes, and they help you land the texture you want, crisp where it counts, tender where it should be. If you’re serving a crowd, it’s easy to double the batch. If it’s just a weeknight, it’s still worth doing because the cleanup is simple and the leftovers reheat well.
Chicken Wings Baked to Golden Perfection Favorite Recipe
Ingredients
Method
- Heat the oven to 425°F. Line a baking sheet with foil for easy cleanup, then place a wire rack on top if you have one.
- Pat the wings dry very well with paper towels. Dry skin is what turns golden instead of rubbery.
- In a bowl, mix salt, pepper, garlic powder, paprika, and any optional seasonings. If using baking powder, whisk it in thoroughly.
- Toss wings with the seasoning mix until evenly coated. If they look dry and patchy, add a small drizzle of olive oil—just enough to help spices cling.
- Arrange wings on the rack (or directly on the lined sheet) in a single layer with space between pieces. Crowding traps steam.
- Bake for 20 minutes, then pull the pan out. You should see rendered fat and early golden spots.
- Flip each wing. The underside should be starting to color and look a bit drier than before.
- Return to the oven and bake another 15–20 minutes until the skin looks deeply golden and slightly blistered.
- For extra crispness, switch to broil for 1–3 minutes at the end, watching closely. You want deep color, not burnt edges.
- If saucing, toss wings in sauce while they’re hot so it clings. If you prefer maximum crisp, serve sauce on the side for dipping.
- Rest wings for 5 minutes. This helps juices settle and keeps the skin from softening too quickly.
- Serve warm with celery and carrots, and any dip you like. The best wings are the ones you eat while they’re still gently crackling.