Ingredients
Method
- Bring Dairy to Room Temperature
- Set cream cheese, butter, and egg out for 30–60 minutes. Soft ingredients blend seamlessly no lumps, no curdling, just silky smoothness.
- Make the Cocoa Cookie Dough
- Cream together butter, granulated sugar, and brown sugar until light and fluffy (2–3 minutes). This aerates the dough and builds structure.
- Add egg and vanilla, beating until fully incorporated.
- In another bowl, whisk flour, cocoa powder, baking powder, baking soda, and salt.
- Gradually combine dry with wet just until the flour disappears. The dough should be soft but not sticky.
- Chill for 20–30 minutes for crisp edges and controlled spread.
- Form the Cookie Cups
- Preheat oven to 350°F (175°C).
- Grease or butter a mini muffin pan. Scoop 1 tablespoon of dough per cup and press it to form a shell, leaving a small cavity in the center.
- A mini tart press or the back of a teaspoon works great.
- First Bake The “Low Fry” Moment
- Bake for 8–10 minutes, just until the edges are set and tops look matte.
- Immediately re-press the centers gently (use a spoon or tamper) to maintain the cup shape — this prevents shallow wells later.
- Let cool slightly while you make the filling.
- Make the Cheesecake Filling
- In a clean bowl, beat cream cheese until fluffy. Add powdered sugar and continue beating until smooth.
- Blend in sour cream (or yogurt) and vanilla extract for that creamy tang.
- If you prefer a baked-set version, whisk in the egg yolk now.
- Fill and Set
- Path A: No-Bake Filling
- Spoon or pipe filling into the warm cups. Let cool 10 minutes, then chill for 30–45 minutes until firm.
- Path B: Lightly Baked Filling
- Spoon filling into partially baked cups, return to oven for 2–4 minutes just enough to barely set.
- Cool 15 minutes, then chill for 20–30 minutes before dipping.
- Melt and Prepare Chocolate Coating
- In a microwave-safe bowl, melt chocolate in 20–30 second bursts at 50% power, stirring each time.
- Once 80% melted, remove and stir until fully smooth. Add 1–2 tsp oil for a glossy, dip-ready finish.
- Optional: sprinkle in a pinch of espresso powder to deepen the cocoa profile.
- Dip and Decorate
- Dip tops of chilled cookie bites into the melted chocolate, letting excess drip off.
- Set them on parchment. While the coating is wet, add sea salt, crushed nuts, or sprinkles for flair.
- Chill 10–15 minutes until the chocolate hardens to a shiny snap.
- Trim and Perfect
- If chocolate pools around the base, trim with a small paring knife for bakery-clean edges.
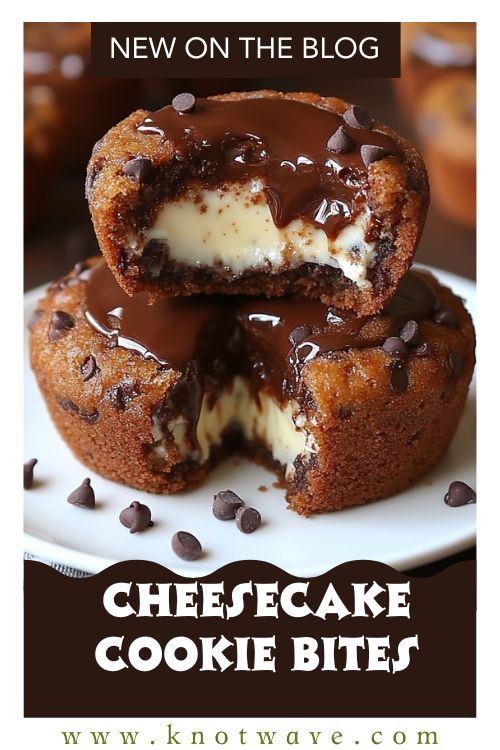
- Admire those glossy domes bite-size perfection achieved!
- Serve
- Stack on a dessert stand or arrange in paper mini-cups. Alternate between plain, sprinkled, and salted for a visually stunning spread.
- Serve slightly chilled or at room temperature cool enough to hold, soft enough to melt.
Notes
- Storage: Refrigerate airtight for up to 5 days.
- Freezing: Freeze (dipped or undipped) up to 1 month; thaw in fridge.
- Reheating: Not required best served chilled or room temp.
- Substitutions: Greek yogurt ⇄ sour cream; Dutch cocoa ⇄ natural cocoa; coconut oil ⇄ neutral oil.
- Scaling: Double dough for larger batches.
- Make-Ahead Tip: Bake cookie cups one day; fill and dip next day for stress-free prep.
- Allergy Notes: Contains dairy, gluten, egg. Use GF flour and dairy-free cream cheese for alternatives.