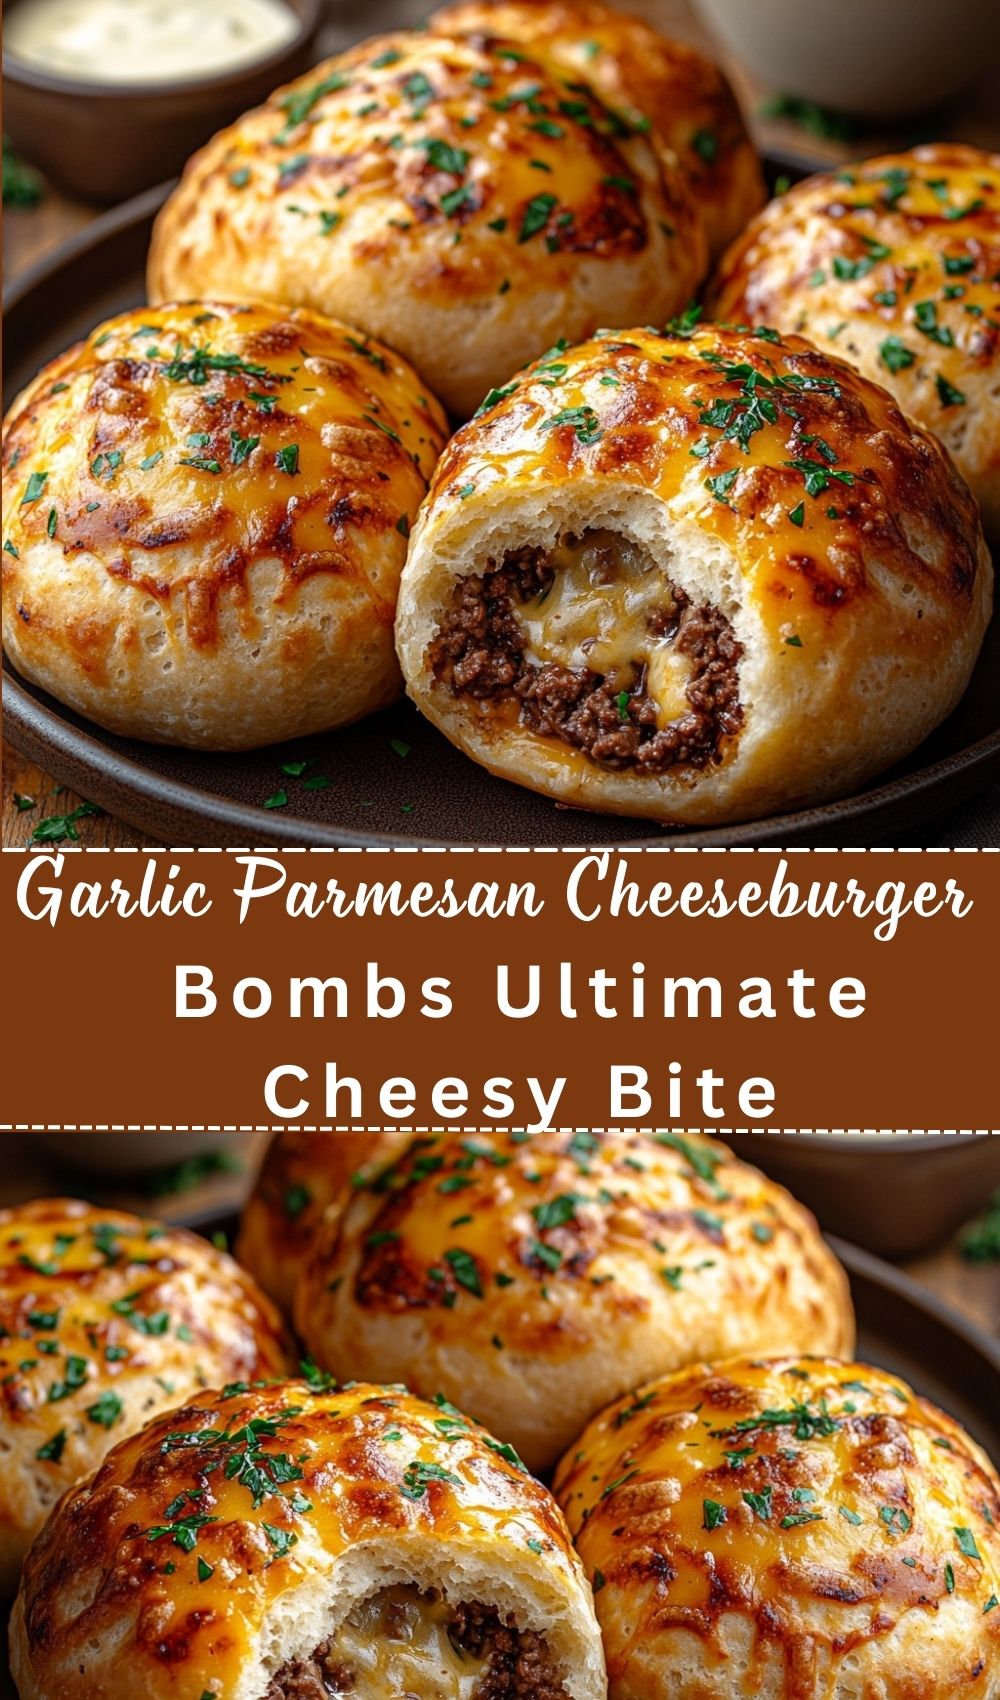
Garlic Parmesan Cheeseburger Bombs Ultimate Cheesy Bite
There’s a certain kind of snack-table magic that feels like takeout night even when you’re standing in your own kitchen, barefoot, with a warm tray in the oven and the whole house smelling like garlicky butter. It’s that cozy excitement: the clink of plates, the rustle of napkins, the “one more bite” energy that turns a simple evening into something worth remembering.
That’s exactly why cheeseburger bombs have become such an iconic, crowd-pleasing idea. They’re familiar in the best way like the comfort of a cheeseburger and the fun of finger food rolled into one. Everyone understands the promise immediately: crisp outside, savory inside, and a melty cheese center that stretches like a little celebration when you pull them apart.
What makes Garlic Parmesan Cheeseburger Bombs extra special is the finish. Instead of stopping at “stuffed dough,” we take them one step further with a buttery garlic-parmesan coating that clings to every golden ridge. That nutty parmesan, the warm garlic aroma, and the tiny flecks of parsley make the whole bite taste like your favorite garlic bread met a juicy burger and decided to team up.
And the method? It’s designed for the perfect contrast. You get a lightly crisp shell, a juicy beef filling that stays tender, and a gooey cheese core without the heartbreak of leaks. The secret is in a few small steps: chilling the filling, using cheese cubes (not shreds), and sealing like you mean it pinch, twist, smooth, and place seam-side down.
In this guide, I’ll walk you through everything: how to season the filling without drying it out, how to choose the best dough option, how to bake or air fry (or even pan-fry and finish), and how to store, freeze, and reheat so they stay crisp. By the end, you’ll be able to make garlic parmesan cheeseburger bombs confidently whether it’s your first time or your fiftieth.
4) Background Story Section
I grew up loving two flavors that felt like instant happiness: cheeseburgers and garlic bread. Burgers were the “special treat food messy in the best way, warm and savory, with that cheesy comfort that made everything feel okay. Garlic bread was the side I secretly loved even more because that buttery, toasted garlic aroma hits you before you even take a bite.
These bombs bring back that same feeling, but in a party-ready shape. The first time you break one open and see the cheese melt and stretch, it’s like the snack equivalent of fireworks. Everyone leans in. Someone audibly says, “Oh wow.” And suddenly you’re not just eating you’re making a moment.
Recreating them at home matters because you get total control: more cheese, less grease, your favorite seasonings, and the exact level of crisp you want. It’s cheaper than ordering a bunch of appetizers, and it feels personal like you made something with intention, not just something quick.
Recipe Information (use a clean table)
| Detail | Info |
|---|---|
| Prep Time | 20 minutes |
| Chill Time | 20 minutes (important for firmness) |
| Cook Time | 12–20 minutes (method-dependent) |
| Total Time | 55–60 minutes |
| Difficulty | Easy–Intermediate (sealing is the skill step) |
| Servings | 10–12 bombs |
| Best For | Game night, family dinner, weekend treat |
Cuisine: American-inspired comfort food
Course: Appetizer / Snack (also works as a fun dinner)
Diet: Not vegetarian (swap options available: turkey/chicken, plant-based beef, dairy-free cheese)
6) Detailed Ingredients List WITH Notes (purpose of each item)
Here’s what you’ll need and why each ingredient matters:
-
Ground beef (80/20 or 85/15)
A little fat keeps the filling juicy. Super-lean beef can taste dry inside dough. If you use lean, add cream cheese or a splash of milk. -
Onion (finely minced) + garlic (minced or paste)
This is your flavor base. Finely minced onion melts into the beef, giving sweetness without chunks that can break the dough. -
Salt + black pepper
Salt wakes everything up. Pepper adds that classic burger bite. -
Paprika and/or chili flakes
A small amount adds warmth and depth especially helpful because dough can mellow seasonings. -
Worcestershire sauce and/or mustard (optional)
Worcestershire adds savory “burger shop” richness. Mustard adds tang and makes the beef taste more like a real cheeseburger. -
Parmesan (finely grated)
Nutty, salty, and perfect for clinging to butter. Finely grated parmesan coats better than shredded. -
Butter (melted)
The glossy garlic butter finish that makes these taste like garlic bread. -
Cream cheese (optional, 2–3 tablespoons)
This is the juiciness insurance. It keeps the filling tender and slightly creamy, especially if your beef is lean. -
Cheese cubes (cheddar, mozzarella, pepper jack)
Cubes melt slower and stay centered. Shredded cheese disappears into the beef and can leak out faster. -
Dough option (choose one): biscuit dough / pizza dough / crescent dough
-
Biscuit dough: fluffy, sturdy, beginner-friendly, great sealing.
-
Pizza dough: chewier, more calzone vibes, very customizable.
-
Crescent dough: buttery and tender, but thinner seal carefully to prevent blowouts.
-
-
Egg wash (1 egg + 1 tbsp water)
Gives golden color and helps toppings stick. Also strengthens seams. -
Breadcrumbs or panko (optional)
Adds an extra crunch layer if you love a crisp shell. -
Parsley (fresh or dried)
Fresh finish that balances richness (and looks beautiful). -
Dipping sauce options
-
Ranch: cool and creamy
-
Sriracha mayo: spicy and tangy
-
Ketchup aioli / burger sauce: classic burger energy
-
Marinara: surprisingly great with garlic parmesan
-
7) Extremely Detailed Step-by-Step Instructions (clear steps)
-
Line a tray with parchment (for oven) or preheat your air fryer basket.
-
Keep a small bowl of water nearby (for smoothing seams).
-
Cut your cheese into ¾-inch cubes and set aside.
-
If using pizza dough, divide into equal portions ahead of time.
-
Oven: Preheat to 400°F (205°C).
-
Air fryer: Preheat to 375°F (190°C) for 3–5 minutes.
-
Pan-fry + finish: Heat oil in a skillet (medium) and preheat oven to 375°F (190°C).
In a bowl, combine:
-
ground beef
-
finely minced onion
-
garlic
-
salt, pepper, paprika/chili flakes
-
Worcestershire and/or mustard (optional)
-
cream cheese (optional)
Mix gently use your hands or a fork and stop as soon as it’s combined. Overmixing makes the filling dense.
Step 4: Pre-cook vs no-pre-cook (choose your style + safety note)
Option A: No pre-cook (juicier, fastest)
-
Best for: tender, juicy filling.
-
Important: You must cook the bombs fully so the beef reaches 160°F / 71°C internally.
Option B: Light pre-cook (extra safe, prevents grease pooling)
-
Brown the beef mixture for 3–4 minutes, just until it loses the raw look (not fully cooked).
-
Drain excess fat if needed.
-
Cool completely before stuffing (hot filling melts dough and causes leaks).
Step 5: Chill the filling (this is your secret weapon)
Put the filling (cooked-cooled or raw) in the fridge for 20 minutes.
Chilled filling is easier to portion, less messy, and less likely to push through seams.
Step 6: Portion evenly for consistent cooking
-
Aim for 1½ to 2 tablespoons filling per bomb.
-
If you can, use a small scoop uniform size = uniform cook time.
-
Roll each portion into a compact ball (this helps sealing).
Step 7: Flatten dough + build the center
For each bomb:
-
Flatten dough into a 3½–4 inch circle (thicker edges = better seal).
-
Place one cheese cube in the center.
-
Place your beef ball on top of the cheese.
Step 8: The sealing technique (pinch, twist, smooth, seam-down rule)
This is the difference between “perfect gooey center and cheese lava on the tray.
-
Pull dough edges up around the filling like a little pouch.
-
Pinch the seam tightly all the way around.
-
Twist the top slightly, then pinch again.
-
Smooth the seam with a tiny dab of water if needed.
-
Roll gently in your hands to round it out.
-
Place on tray seam-side down (this locks the seal during cooking).
Step 9: Egg wash + coating
-
Brush each bomb lightly with egg wash.
-
Optional crunch: roll in panko or sprinkle over the top.
-
Add a light dusting of parmesan now if you want extra crust (save most for the butter finish).
Step 10A: Cook Method A Oven-Baked (easiest, great for batches)
-
Place bombs on parchment with space between.
-
Bake at 400°F (205°C) for 18–20 minutes, until deeply golden and cooked through.
-
If you have a thermometer, check one center: 160°F / 71°C for beef.
-
Spray basket lightly and place bombs with space (don’t overcrowd).
-
Air fry at 375°F (190°C) for 10–12 minutes, flipping once halfway if your fryer cooks unevenly.
-
Work in batches for best crisp.
-
Heat a thin layer of oil over medium heat.
-
Sear bombs for 2–3 minutes per side until golden.
-
Transfer to oven at 375°F (190°C) for 8–10 minutes until fully cooked.
Let them rest 5 minutes.
This keeps the cheese molten but less likely to blast out on the first bite.
Step 12: Garlic Parmesan butter finish (the signature step)
Mix:
-
melted butter
-
garlic (minced or powder)
-
finely grated parmesan
-
parsley
-
pinch of salt (optional)
Brush or toss warm bombs in the garlic butter mixture.
Adding it after cooking keeps garlic fragrant and parmesan nutty not burnt.
8) Pro Tips & Chef Secrets (at least 10 tips)
-
Use cheese cubes, not shredded. Cubes stay centered and melt slower, reducing leaks.
-
Chill the filling. Cold filling seals easier and helps bombs keep shape.
-
Thicker dough edges = stronger seam. Don’t stretch dough paper-thin.
-
Pinch twice, then smooth. Pinch the seam, twist, pinch again then smooth with damp fingers.
-
Always bake seam-side down. Heat presses the seam into the tray, “locking” it shut.
-
Don’t overstuff. Too much filling makes the dough fight you and burst during cooking.
-
Avoid raw dough centers: keep size consistent and don’t make them huge; use a thermometer if unsure.
-
Taste seasoning safely: if using raw filling, pan-fry a tiny piece to taste before stuffing.
-
Garlic butter goes on after cooking. It keeps garlic bright and prevents parmesan from burning.
-
Parmesan can burn fast. If you want parmesan on top while cooking, use a light sprinkle and save most for after.
-
Air fryer spacing matters. Crowding traps steam and softens the crust—cook in batches.
-
Flash-freeze for perfect meal prep. Freeze bombs on a tray first, then bag them so they don’t stick.
9) Serving Suggestions (detailed)
Sides that love these bombs:
-
Crispy fries or wedges (classic)
-
Coleslaw (crunch + tang balance)
-
Simple salad with pickles or vinegar dressing (cuts richness)
-
Pickles and jalapeños (burger energy, bright bite)
Dipping sauces:
-
Burger sauce: mayo + ketchup + mustard + pickle relish
-
Ranch: cooling and creamy
-
Spicy mayo: mayo + sriracha + lime
-
Marinara: surprisingly cozy with garlic parmesan
Plating ideas (make it look irresistible):
-
Serve on a wooden board lined with parchment.
-
Add a small bowl of garlic butter for extra brushing.
-
Sprinkle more parsley and parmesan right before serving.
-
For the best cheese pull photo: cut one bomb open after the 5-minute rest and pull gently slow stretch, big drama.
10) Variations Section (at least 5 detailed variations)
-
Spicy Jalapeño Pepper Jack Bombs
Add chopped pickled jalapeños to the filling and use pepper jack cubes. Finish with a tiny pinch of chili flakes in the garlic butter. -
Bacon Mushroom Smash-Bombs
Sauté chopped mushrooms until golden, mix into beef with crispy bacon bits. Use sharp cheddar cubes for a smoky, savory bite. -
BBQ Cheddar Version
Add a spoon of BBQ sauce to the filling and swap parsley for sliced green onions. Serve with ranch or extra BBQ for dipping. -
Pizza-Style (Mozzarella + Pepperoni)
Use pizza dough, add diced pepperoni to the filling, and use mozzarella cubes. Dip in warm marinara for pizza roll vibes upgraded. -
Chicken or Turkey Lean Version
Use ground turkey/chicken and add cream cheese (or a splash of milk) for moisture. Season a bit more boldly, since lean meat needs extra help. -
Keto-ish Idea (low-carb wrap alternative limits explained)
True dough is the carb-heavy part, but you can do a keto-inspired version by wrapping the filling around a cheese shell (baked cheese rounds) or using low-carb tortillas cut and sealed tightly. Note: these won’t puff like dough, and sealing is trickier best baked and eaten fresh.
11) Recipe Summary Box (3–4 easy sentences)
Garlic Parmesan Cheeseburger Bombs are stuffed dough bites filled with juicy seasoned beef and a melty cheese cube center. Seal them tightly, bake or air fry until golden, then brush with buttery garlic-parmesan sauce. They’re perfect for parties, cozy dinners, and make-ahead snacks especially with a good dipping sauce.
12) Recipe Notes Section
Storage (fridge time):
Keep cooked bombs in an airtight container for up to 3 days. Let them cool fully before sealing the container to avoid sogginess.
Freezing (raw vs cooked):
-
Freeze raw: Assemble, place on a tray, freeze until solid, then bag. Bake/air fry from frozen, adding a few extra minutes.
-
Freeze cooked: Cool completely, wrap well, and freeze up to 2 months. Reheat in oven/air fryer for best texture.
Reheating (oven/air fryer best):
-
Air fryer: 350°F (175°C) for 4–6 minutes
-
Oven: 375°F (190°C) for 8–10 minutes
Avoid microwaving if you want crisp microwave makes dough soft.
Substitutions (dough, cheese, beef):
-
Dough: biscuit = easiest, pizza dough = chewy, crescent = buttery but delicate.
-
Cheese: cheddar, mozzarella, pepper jack, or even smoked gouda cubes.
-
Beef: turkey/chicken works just add moisture insurance (cream cheese).
Scaling for parties:
Double the batch and bake on two trays. Rotate trays halfway for even browning.
Meal prep tips (make filling ahead):
Make filling a day early and chill. You can also pre-portion the meat balls and cube the cheese ahead to assemble quickly.
13) Conclusion (1–2 warm, inviting paragraphs)
If you’re craving something that feels like comfort food and celebration at the same time, these Garlic Parmesan Cheeseburger Bombs deliver every single bite: crisp, golden shell… juicy burger center… and that melty cheese pull that makes everyone smile before they even taste it. The garlic-parmesan finish is the final wow warm butter, nutty cheese, and a cozy aroma that makes the kitchen feel like home.
When you make them, I’d love to hear how you served yours ranch, burger sauce, spicy mayo, or marinara? Leave a comment, rate the recipe, and share your cheese-pull moment. Happy cooking (and don’t forget: seam-side down)!

Garlic Parmesan Cheeseburger Bombs Ultimate Cheesy Bite
Ingredients
Method
- Step 1: Set up your station (this makes sealing easy)
- Line a tray with parchment (for oven) or preheat your air fryer basket.
- Keep a small bowl of water nearby (for smoothing seams).
- Cut your cheese into ¾-inch cubes and set aside.
- If using pizza dough, divide into equal portions ahead of time.
- Step 2: Preheat based on your cooking method
- Oven: Preheat to 400°F (205°C).
- Air fryer: Preheat to 375°F (190°C) for 3–5 minutes.
- Pan-fry + finish: Heat oil in a skillet (medium) and preheat oven to 375°F (190°C).
- Step 3: Mix the filling correctly (don’t overmix)
- In a bowl, combine:
- ground beef
- finely minced onion
- garlic
- salt, pepper, paprika/chili flakes
- Worcestershire and/or mustard (optional)
- cream cheese (optional)
- Mix gently use your hands or a fork and stop as soon as it’s combined. Overmixing makes the filling dense.
- Step 4: Pre-cook vs no-pre-cook (choose your style + safety note)
- Option A: No pre-cook (juicier, fastest)
- Best for: tender, juicy filling.
- Important: You must cook the bombs fully so the beef reaches 160°F / 71°C internally.
- Option B: Light pre-cook (extra safe, prevents grease pooling)
- Brown the beef mixture for 3–4 minutes, just until it loses the raw look (not fully cooked).
- Drain excess fat if needed.
- Cool completely before stuffing (hot filling melts dough and causes leaks).
- Step 5: Chill the filling (this is your secret weapon)
- Put the filling (cooked-cooled or raw) in the fridge for 20 minutes.
- Chilled filling is easier to portion, less messy, and less likely to push through seams.
- Step 6: Portion evenly for consistent cooking
- Aim for 1½ to 2 tablespoons filling per bomb.
- If you can, use a small scoop—uniform size = uniform cook time.
- Roll each portion into a compact ball (this helps sealing).
- Step 7: Flatten dough + build the center
- For each bomb:
- Flatten dough into a 3½–4 inch circle (thicker edges = better seal).
- Place one cheese cube in the center.
- Place your beef ball on top of the cheese.
- Step 8: The sealing technique (pinch, twist, smooth, seam-down rule)
- This is the difference between “perfect gooey center” and “cheese lava on the tray.”
- Pull dough edges up around the filling like a little pouch.
- Pinch the seam tightly all the way around.
- Twist the top slightly, then pinch again.
- Smooth the seam with a tiny dab of water if needed.
- Roll gently in your hands to round it out.
- Place on tray seam-side down (this “locks” the seal during cooking).
- Step 9: Egg wash + coating
- Brush each bomb lightly with egg wash.
- Optional crunch: roll in panko or sprinkle over the top.
- Add a light dusting of parmesan now if you want extra crust (save most for the butter finish).
- Step 10A: Cook Method A Oven-Baked (easiest, great for batches)
- Place bombs on parchment with space between.
- Bake at 400°F (205°C) for 18–20 minutes, until deeply golden and cooked through.
- If you have a thermometer, check one center: 160°F / 71°C for beef.
- Step 10B: Cook Method B Air Fryer (crispiest outside)
- Spray basket lightly and place bombs with space (don’t overcrowd).
- Air fry at 375°F (190°C) for 10–12 minutes, flipping once halfway if your fryer cooks unevenly.
- Work in batches for best crisp.
- Step 10C: Cook Method C — Pan-Fry + Finish (extra golden, restaurant vibe)
- Heat a thin layer of oil over medium heat.
- Sear bombs for 2–3 minutes per side until golden.
- Transfer to oven at 375°F (190°C) for 8–10 minutes until fully cooked.
- Step 11: Rest time (so cheese doesn’t explode)
- Let them rest 5 minutes.
- This keeps the cheese molten but less likely to blast out on the first bite.
- Step 12: Garlic Parmesan butter finish (the signature step)
- Mix:
- melted butter
- garlic (minced or powder)
- finely grated parmesan
- parsley
- pinch of salt (optional)
- Brush or toss warm bombs in the garlic butter mixture.
- Adding it after cooking keeps garlic fragrant and parmesan nutty not burnt.
Notes
Keep cooked bombs in an airtight container for up to 3 days. Let them cool fully before sealing the container to avoid sogginess. Freezing (raw vs cooked):
- Freeze raw: Assemble, place on a tray, freeze until solid, then bag. Bake/air fry from frozen, adding a few extra minutes.
- Freeze cooked: Cool completely, wrap well, and freeze up to 2 months. Reheat in oven/air fryer for best texture.
- Air fryer: 350°F (175°C) for 4–6 minutes
-
Oven: 375°F (190°C) for 8–10 minutes
Avoid microwaving if you want crisp—microwave makes dough soft.
- Dough: biscuit = easiest, pizza dough = chewy, crescent = buttery but delicate.
- Cheese: cheddar, mozzarella, pepper jack, or even smoked gouda cubes.
- Beef: turkey/chicken works just add moisture insurance (cream cheese).
Double the batch and bake on two trays. Rotate trays halfway for even browning. Meal prep tips (make filling ahead):
Make filling a day early and chill. You can also pre-portion the meat balls and cube the cheese ahead to assemble quickly.