The Ultimate Zebra Cake Recipe: Moist, Swirled & Absolutely Yummy
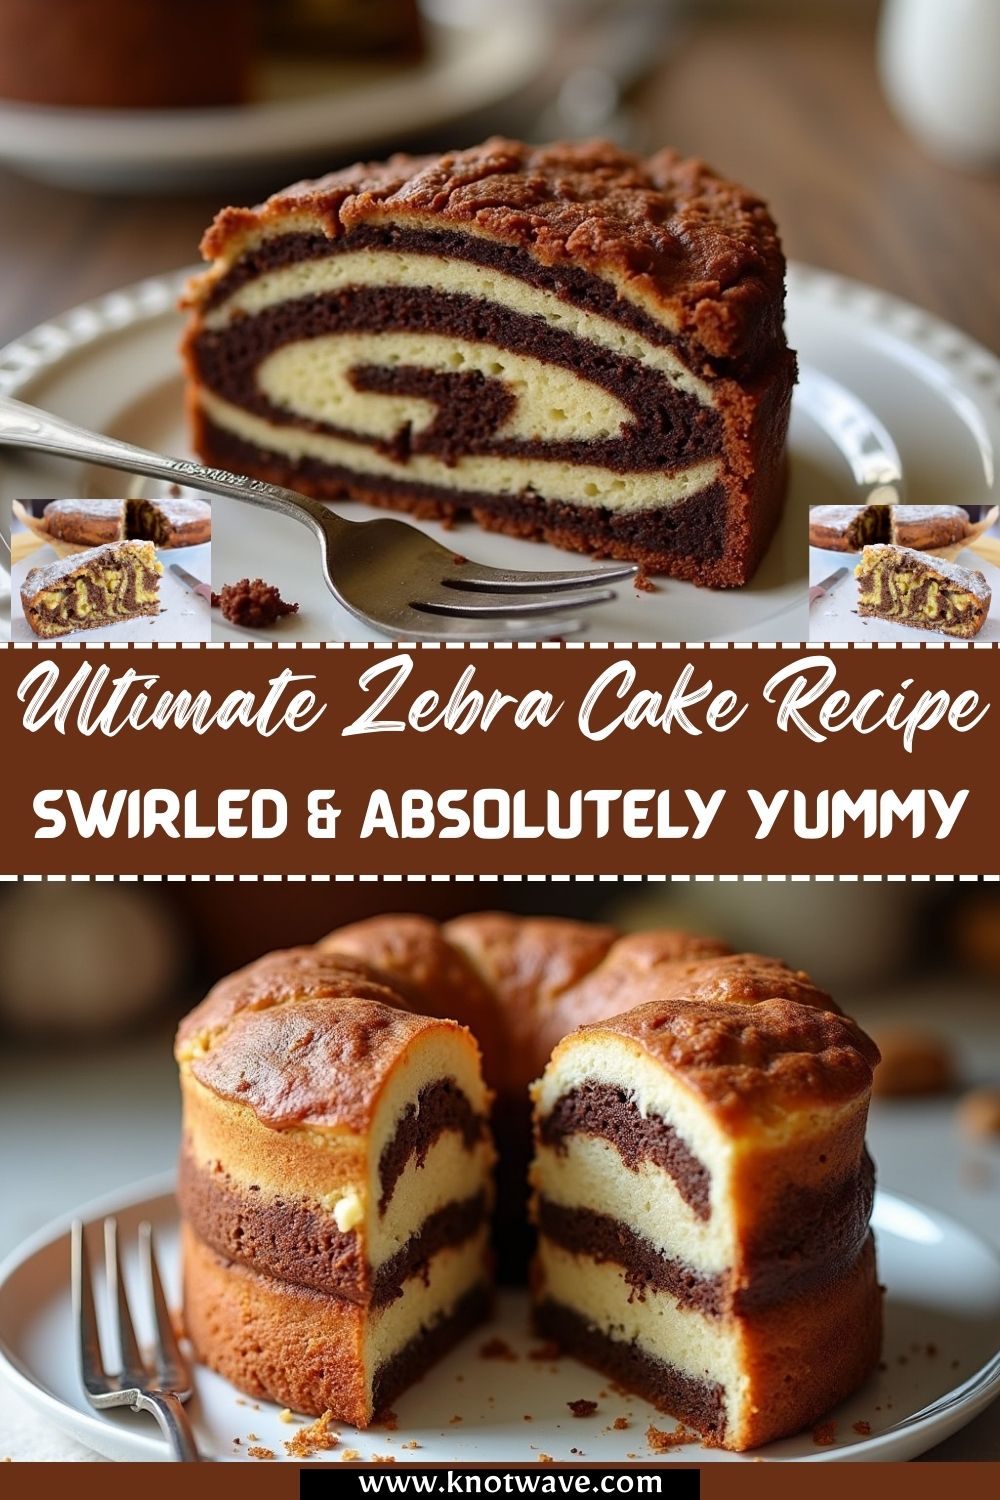
Few desserts strike the balance between visual wow factor and delicious flavor quite like zebra cake. With its mesmerizing chocolate-and-vanilla stripes, this cake is as much a feast for the eyes as it is for the taste buds. The Ultimate Zebra Cake Recipe: Moist, Swirled & Absolutely Yummy is designed to help you create a soft, moist, and perfectly patterned cake right in your home kitchen.
One of the best things about this cake is its versatility. It works beautifully as a birthday centerpiece, a sweet ending to dinner, or a playful treat for kids who love the stripy design. Despite its professional bakery appearance, it’s surprisingly easy to master. The step by step cooking process uses everyday pantry staples, and you don’t need advanced decorating skills.
The taste is a delightful combination of light, fluffy vanilla sponge paired with rich cocoa flavor. Each bite gives you both, without being overly sweet or heavy. If you’re someone who loves homemade cakes but doesn’t want the fuss of frosting or layering, this zebra cake is the perfect solution.
What Makes It Healthy & Special
While zebra cake is certainly an indulgence, it can be made in a balanced and healthier way. Instead of butter-heavy batters, this recipe uses oil, which keeps the crumb moist without being overly rich. Cocoa powder, besides giving a deep chocolate flavor, is also rich in antioxidants. Vanilla adds natural sweetness, reducing the need for excessive sugar.
The special element, of course, is the pattern technique. By alternating spoonfuls of chocolate and vanilla batter, you get neat concentric rings that bake into gorgeous stripes. Unlike marble cake, where the batters are swirled randomly, zebra cake is all about precision and patience. The result is a cake that looks like it took hours of skill but actually comes together with a bit of practice.
Culturally, this cake has roots in European home baking traditions and has become popular worldwide for its playful yet elegant look. It’s also great for families, because kids love helping spoon the batters and watching the stripes form. In short, zebra cake isn’t just about taste it’s about the fun, creativity, and joy of baking at home.
Ingredients
For the Cake Batter
-
2 cups (250 g) all-purpose flour
-
1 cup (200 g) granulated sugar
-
1 tbsp baking powder
-
½ tsp salt
-
1 cup (240 ml) vegetable oil (or melted butter)
-
1 cup (240 ml) milk, room temperature
-
4 large eggs
-
2 tsp vanilla extract
-
2 tbsp unsweetened cocoa powder
Optional Add-Ins
-
½ tsp instant espresso powder (enhances chocolate flavor)
-
½ cup (90 g) mini chocolate chips (fold into chocolate batter for extra richness)
Instructions / Method
-
Preheat your oven to 180°C / 350°F. Grease and line an 8-inch (20 cm) round cake pan with parchment paper.
-
Pro Tip: Use a springform pan for easy removal.
-
-
Mix the dry ingredients. In a large bowl, whisk together flour, sugar, baking powder, and salt. Set aside.
-
Prepare the wet mixture. In another bowl, beat the eggs lightly. Add milk, oil, and vanilla extract. Whisk until smooth.
-
Combine wet and dry. Gradually add the wet ingredients to the dry mixture, whisking until you have a smooth batter. Avoid overmixing to keep the cake tender.
-
Divide the batter. Split the mixture evenly into two bowls. In one bowl, mix in 2 tbsp cocoa powder (and espresso powder, if using). The other bowl remains vanilla.
-
Start the zebra layering.
-
Place 3 tbsp vanilla batter in the center of the cake pan.
-
On top of that, spoon 3 tbsp chocolate batter, directly in the center.
-
Continue alternating batters, always spooning into the center. The batter will spread outward naturally, forming stripes.
-
Visual Cue: You should see concentric rings forming as you build layers.
-
-
Bake. Transfer the pan to the oven and bake for 40–45 minutes. The cake is ready when a toothpick inserted into the center comes out clean.
-
Pro Tip: Resist opening the oven in the first 30 minutes to prevent collapsing.
-
-
Cool. Allow the cake to cool in the pan for 10 minutes, then transfer to a wire rack to cool completely.
-
Serve. Slice to reveal the zebra stripes. Enjoy plain, dusted with powdered sugar, or with whipped cream on the side.
-
Make-Ahead Option: Once cooled, wrap tightly and store at room temperature for up to 3 days, or freeze for up to 2 months.
-
Recipe Information Box

The Ultimate Zebra Cake Recipe: Moist, Swirled & Absolutely Yummy
Ingredients
Method
- Preheat your oven to 180°C / 350°F. Grease and line an 8-inch (20 cm) round cake pan with parchment paper.
- Pro Tip: Use a springform pan for easy removal.
- Mix the dry ingredients. In a large bowl, whisk together flour, sugar, baking powder, and salt. Set aside.
- Prepare the wet mixture. In another bowl, beat the eggs lightly. Add milk, oil, and vanilla extract. Whisk until smooth.
- Combine wet and dry. Gradually add the wet ingredients to the dry mixture, whisking until you have a smooth batter. Avoid overmixing to keep the cake tender.
- Divide the batter. Split the mixture evenly into two bowls. In one bowl, mix in 2 tbsp cocoa powder (and espresso powder, if using). The other bowl remains vanilla.
- Start the zebra layering.
- Place 3 tbsp vanilla batter in the center of the cake pan.
- On top of that, spoon 3 tbsp chocolate batter, directly in the center.
- Continue alternating batters, always spooning into the center. The batter will spread outward naturally, forming stripes.
- Visual Cue: You should see concentric rings forming as you build layers.
- Bake. Transfer the pan to the oven and bake for 40–45 minutes. The cake is ready when a toothpick inserted into the center comes out clean.
- Pro Tip: Resist opening the oven in the first 30 minutes to prevent collapsing.
- Cool. Allow the cake to cool in the pan for 10 minutes, then transfer to a wire rack to cool completely.
- Serve. Slice to reveal the zebra stripes. Enjoy plain, dusted with powdered sugar, or with whipped cream on the side.
- Make-Ahead Option: Once cooled, wrap tightly and store at room temperature for up to 3 days, or freeze for up to 2 months.
Notes
Variations
- Extra Chocolatey: Add a layer of chocolate ganache over the cooled cake.
- Nutty Delight: Mix chopped walnuts or hazelnuts into the vanilla batter.
- Gluten-Free: Use a 1:1 gluten-free flour blend.
Substitutions
- Milk: Swap with almond, oat, or coconut milk for a dairy-free option.
- Oil: Coconut oil or melted butter can be used instead of vegetable oil.
- Sugar: Try coconut sugar or light brown sugar for a deeper flavor.
Make-Ahead & Storage
- Store at room temperature for up to 3 days in an airtight container.
- Refrigerate for longer freshness, but bring to room temperature before serving.
- Freeze tightly wrapped slices for up to 2 months; thaw overnight before serving.
Troubleshooting & Common Mistakes
- Dry Cake: Caused by overbaking—start checking at the 40-minute mark.
- Uneven Stripes: Batter thickness should be equal; if too thick, add 1–2 tbsp milk.
- Dense Texture: Overmixing develops gluten—stir gently until just combined.
Tools & Equipment
- 8-inch (20 cm) round cake pan (springform recommended)
- Two mixing bowls
- Whisk or hand mixer
- Measuring cups and spoons
- Cooling rack
Serving Ideas
- Dust with powdered sugar for a simple finish.
- Serve with fresh strawberries and whipped cream.
- Pair with coffee, tea, or a glass of cold milk.